Alta Labs Conversion Guide
Prerequisites
- Alta Labs AP running firmware 2.2g or later.
- Access point(s) adopted into Alta Control.
- Existing SSID(s) already have basic traffic routing in place.
- Certificates (
ca.pem,cert.pem,key.pem) delivered from Helium network onboarding. - Outbound TCP port 2083 permitted from the access point to the Helium AAA.
Alta Labs access points run radsecproxy on the device itself, so no external proxy container is
required.
High-Level Steps
- Create the Helium SSID and point it at the access point's local RadSec proxy.
- Apply the Power-User configuration carrying the certificates and Passpoint parameters.
- Connect a device with a supported carrier to confirm the SSID works.
Create the Helium SSID
Log in to Alta Control, select the site where Helium will be enabled, and navigate to Settings > WiFi.
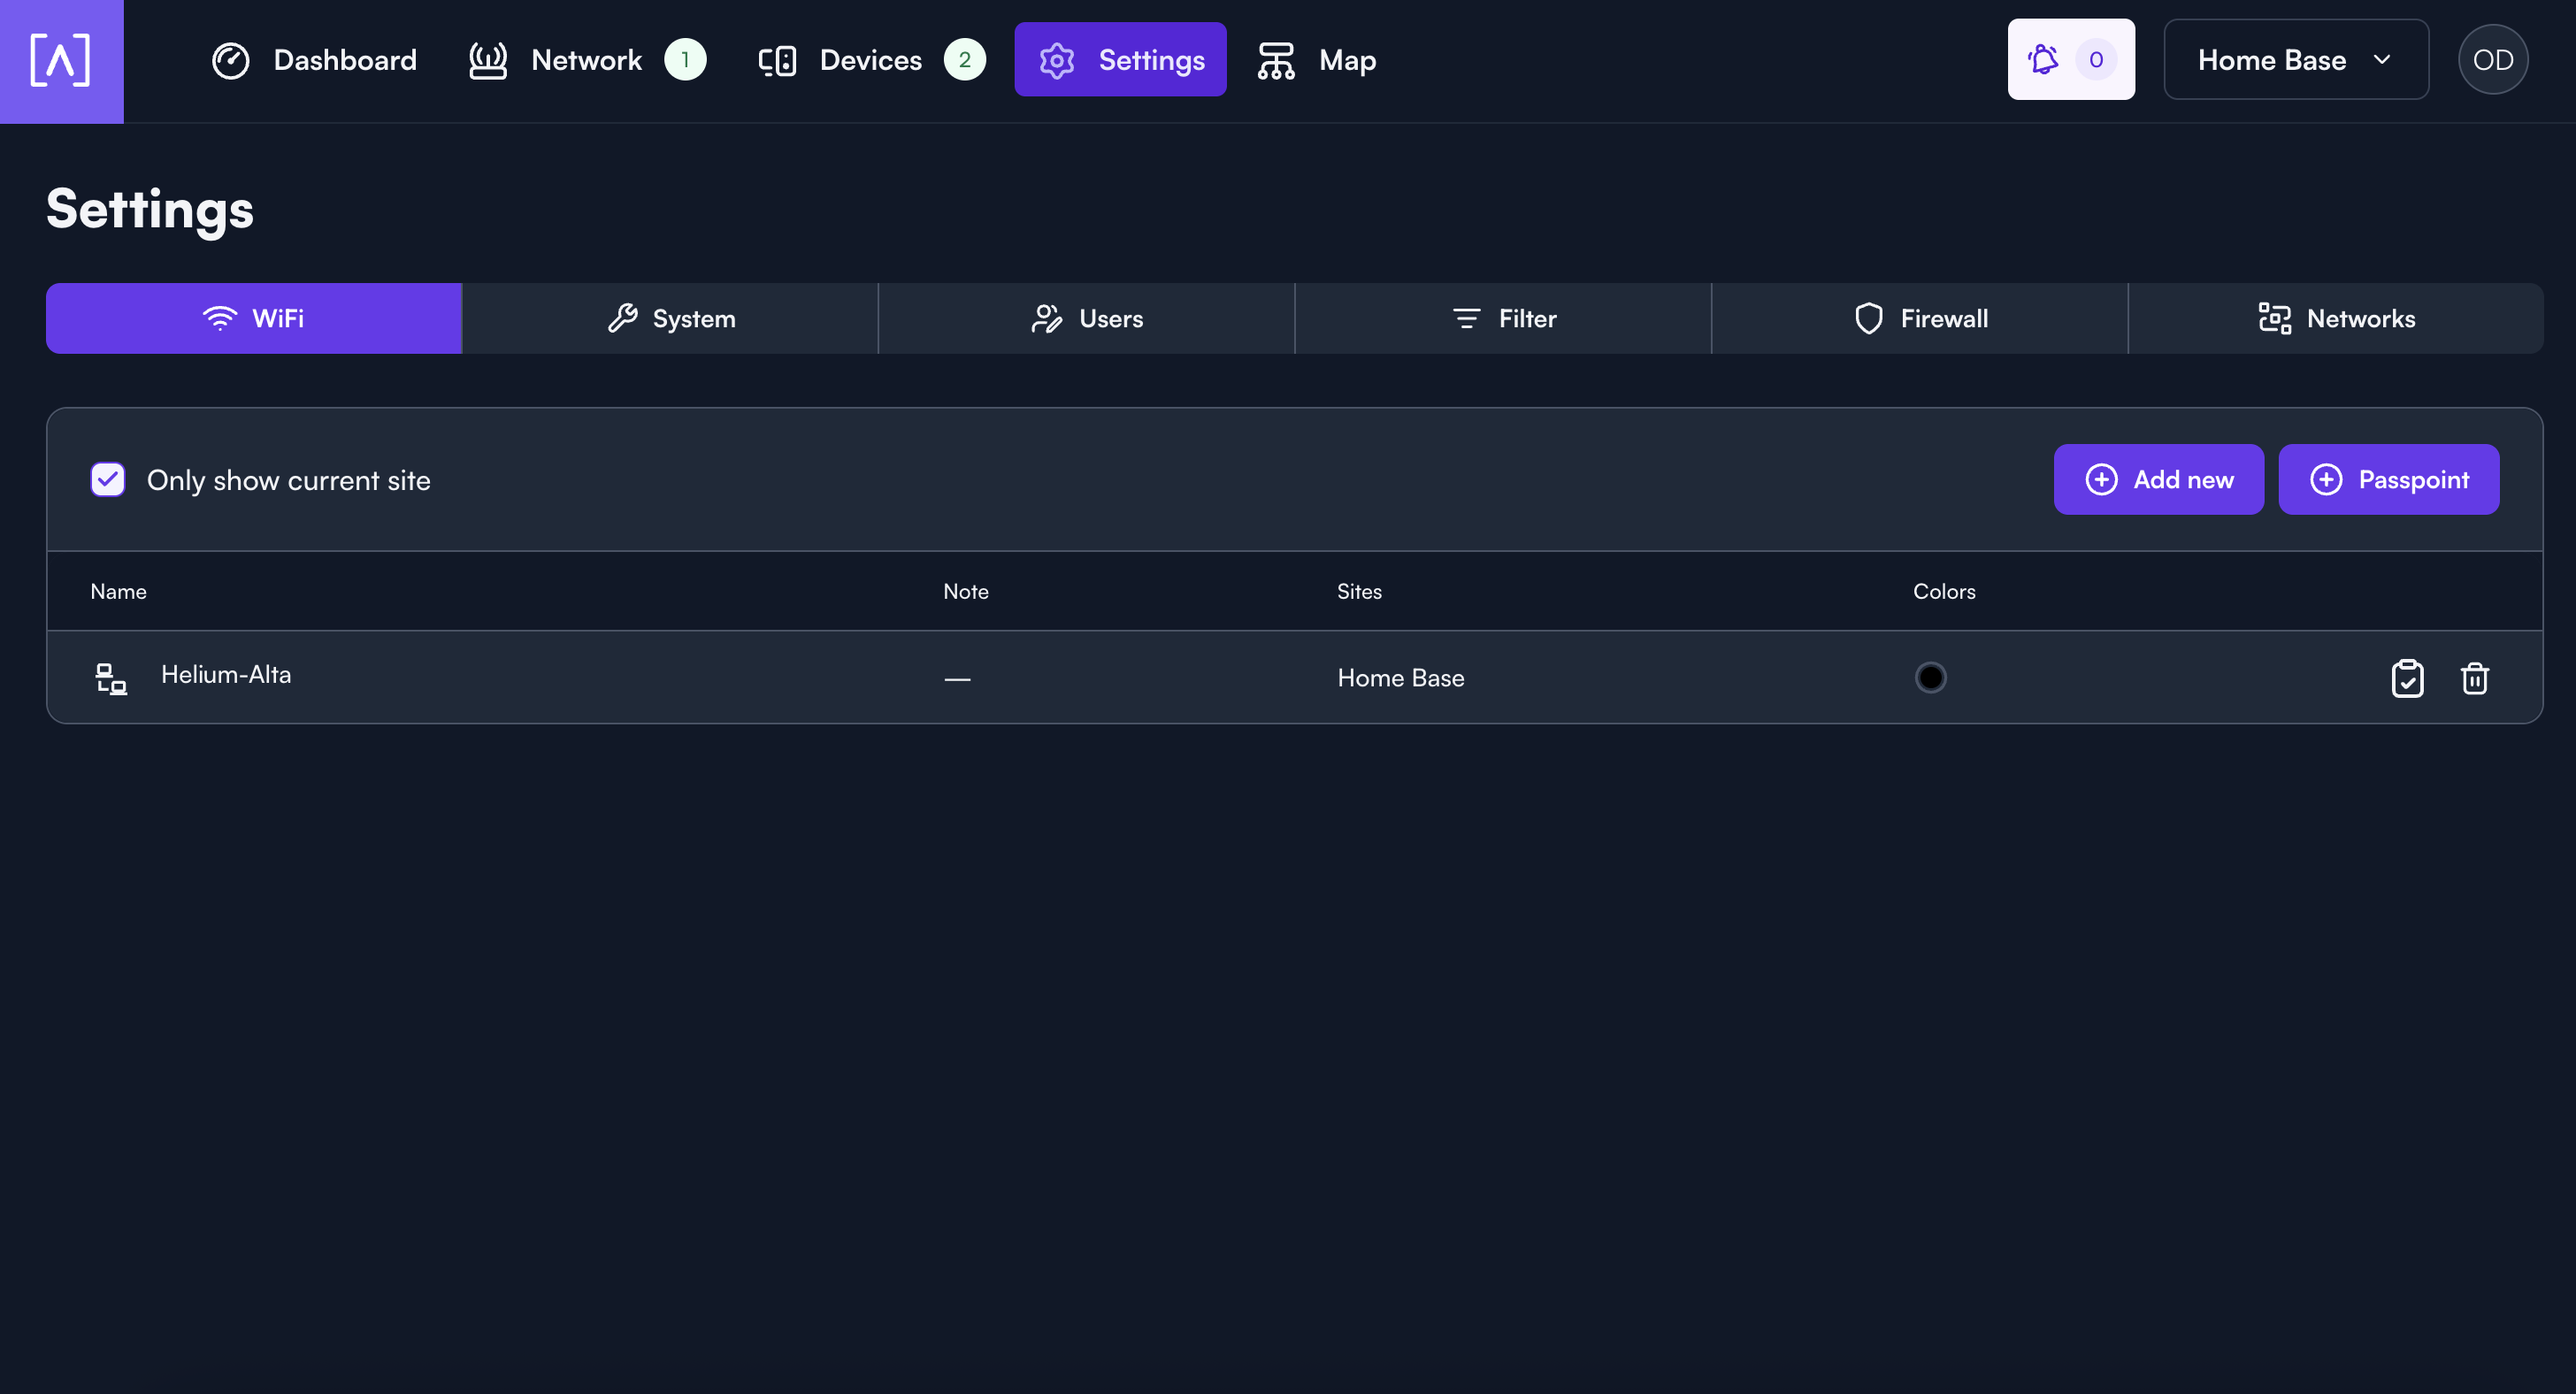
- Press Add new.
- Enter a WiFi Network Name e.g.
Helium, and confirm Enabled is switched on. - Under WiFi Security, select Enterprise.
- Under Radius Server, set IP Address to
127.0.0.1, Secret toradsec, Auth. Port to1812, and Acct. Port to1813. - Under Sites, select the site(s) that will broadcast the SSID.
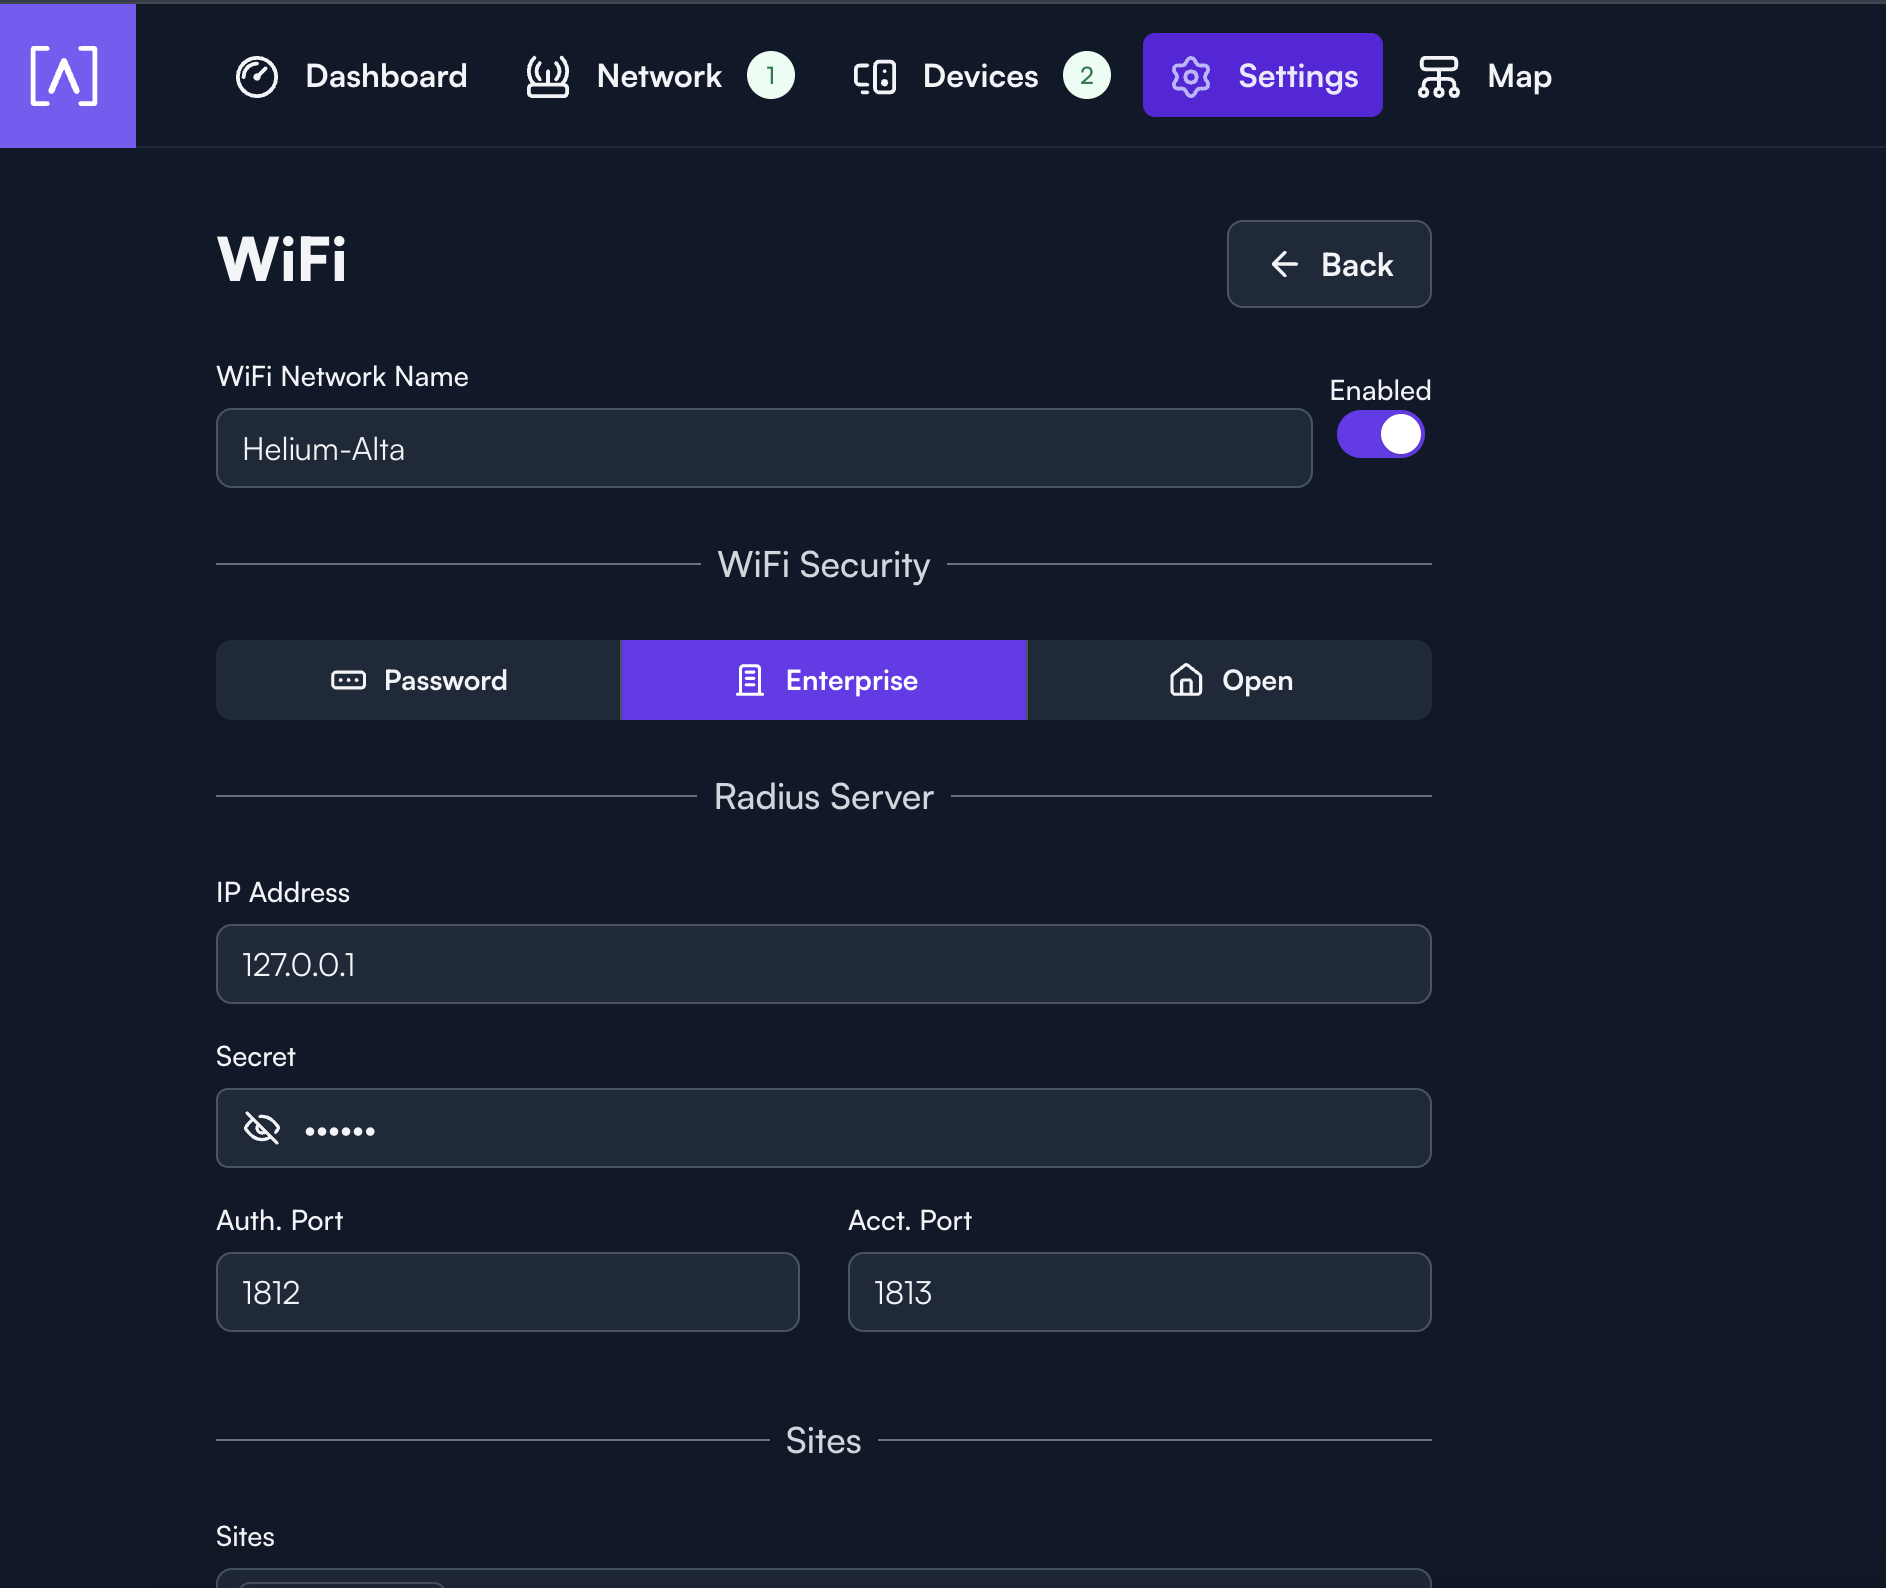
Use 127.0.0.1, not the Helium AAA address. The access point runs its own RadSec proxy, which
forwards authentication to Helium over an encrypted connection. Pointing this field at the AAA skips
that proxy and authentication fails.
Apply the Power-User Configuration
This is the configuration to paste. Replace each -----BEGIN ...----- block with the matching PEM
from the onboarding bundle, and set venue_name to a name for the site.
{
  "radsec": {
    "tls": {
      "default": {
        "cacerts": {
          "9f4c149e.0": "-----BEGIN CERTIFICATE-----\n(DigiCert Global G2 TLS RSA SHA256 2020 CA1)\n-----END CERTIFICATE-----",
          "607986c7.0": "-----BEGIN CERTIFICATE-----\n(DigiCert Global Root G2)\n-----END CERTIFICATE-----"
        },
        "cert": "-----BEGIN CERTIFICATE-----\n(contents of cert.pem)\n-----END CERTIFICATE-----",
        "key": "-----BEGIN EC PRIVATE KEY-----\n(contents of key.pem)\n-----END EC PRIVATE KEY-----"
      }
    },
    "realms": {
      "*": {
        "servers": ["brownfield-proxy-sec.prod.aaa.nova.xyz"],
        "tls": "default"
      }
    }
  },
  "hostapd": "hs20=1\ndisable_dgaf=1\nhs20_oper_friendly_name=eng:Helium\ninterworking=1\naccess_network_type=2\ninternet=1\nradius_acct_interim_interval=300\nvenue_name=eng:My Venue\ndomain_name=freedomfi.com,hellohelium.com\nnai_realm=0,freedomfi.com,13[5:6]\nnai_realm=0,hellohelium.com,13[5:6]"
}
Use the cacerts key names exactly as written. Each one becomes a filename on the access point, and
the proxy looks certificates up by that name. Change them and the certificates are ignored.
| Subject | Key name | Expires |
|---|---|---|
| DigiCert Global G2 TLS RSA SHA256 2020 CA1 | 9f4c149e.0 | Mar 2031 |
| DigiCert Global Root G2 | 607986c7.0 | Jan 2038 |
The onboarding bundle's ca.pem may hold more certificates than these two. Match each block to the
table by its subject. If you cannot tell them apart, ask the Helium Plus team for the two
certificates named as above.
Two more details to watch:
- The client certificate and key use the names
certandkey, notcert.pemandkey.pem. - Every CA belongs inside
cacerts.
Write each line break inside a PEM as \n, exactly as the example shows. Each certificate is a
single JSON string.
With that ready, apply it to the SSID:
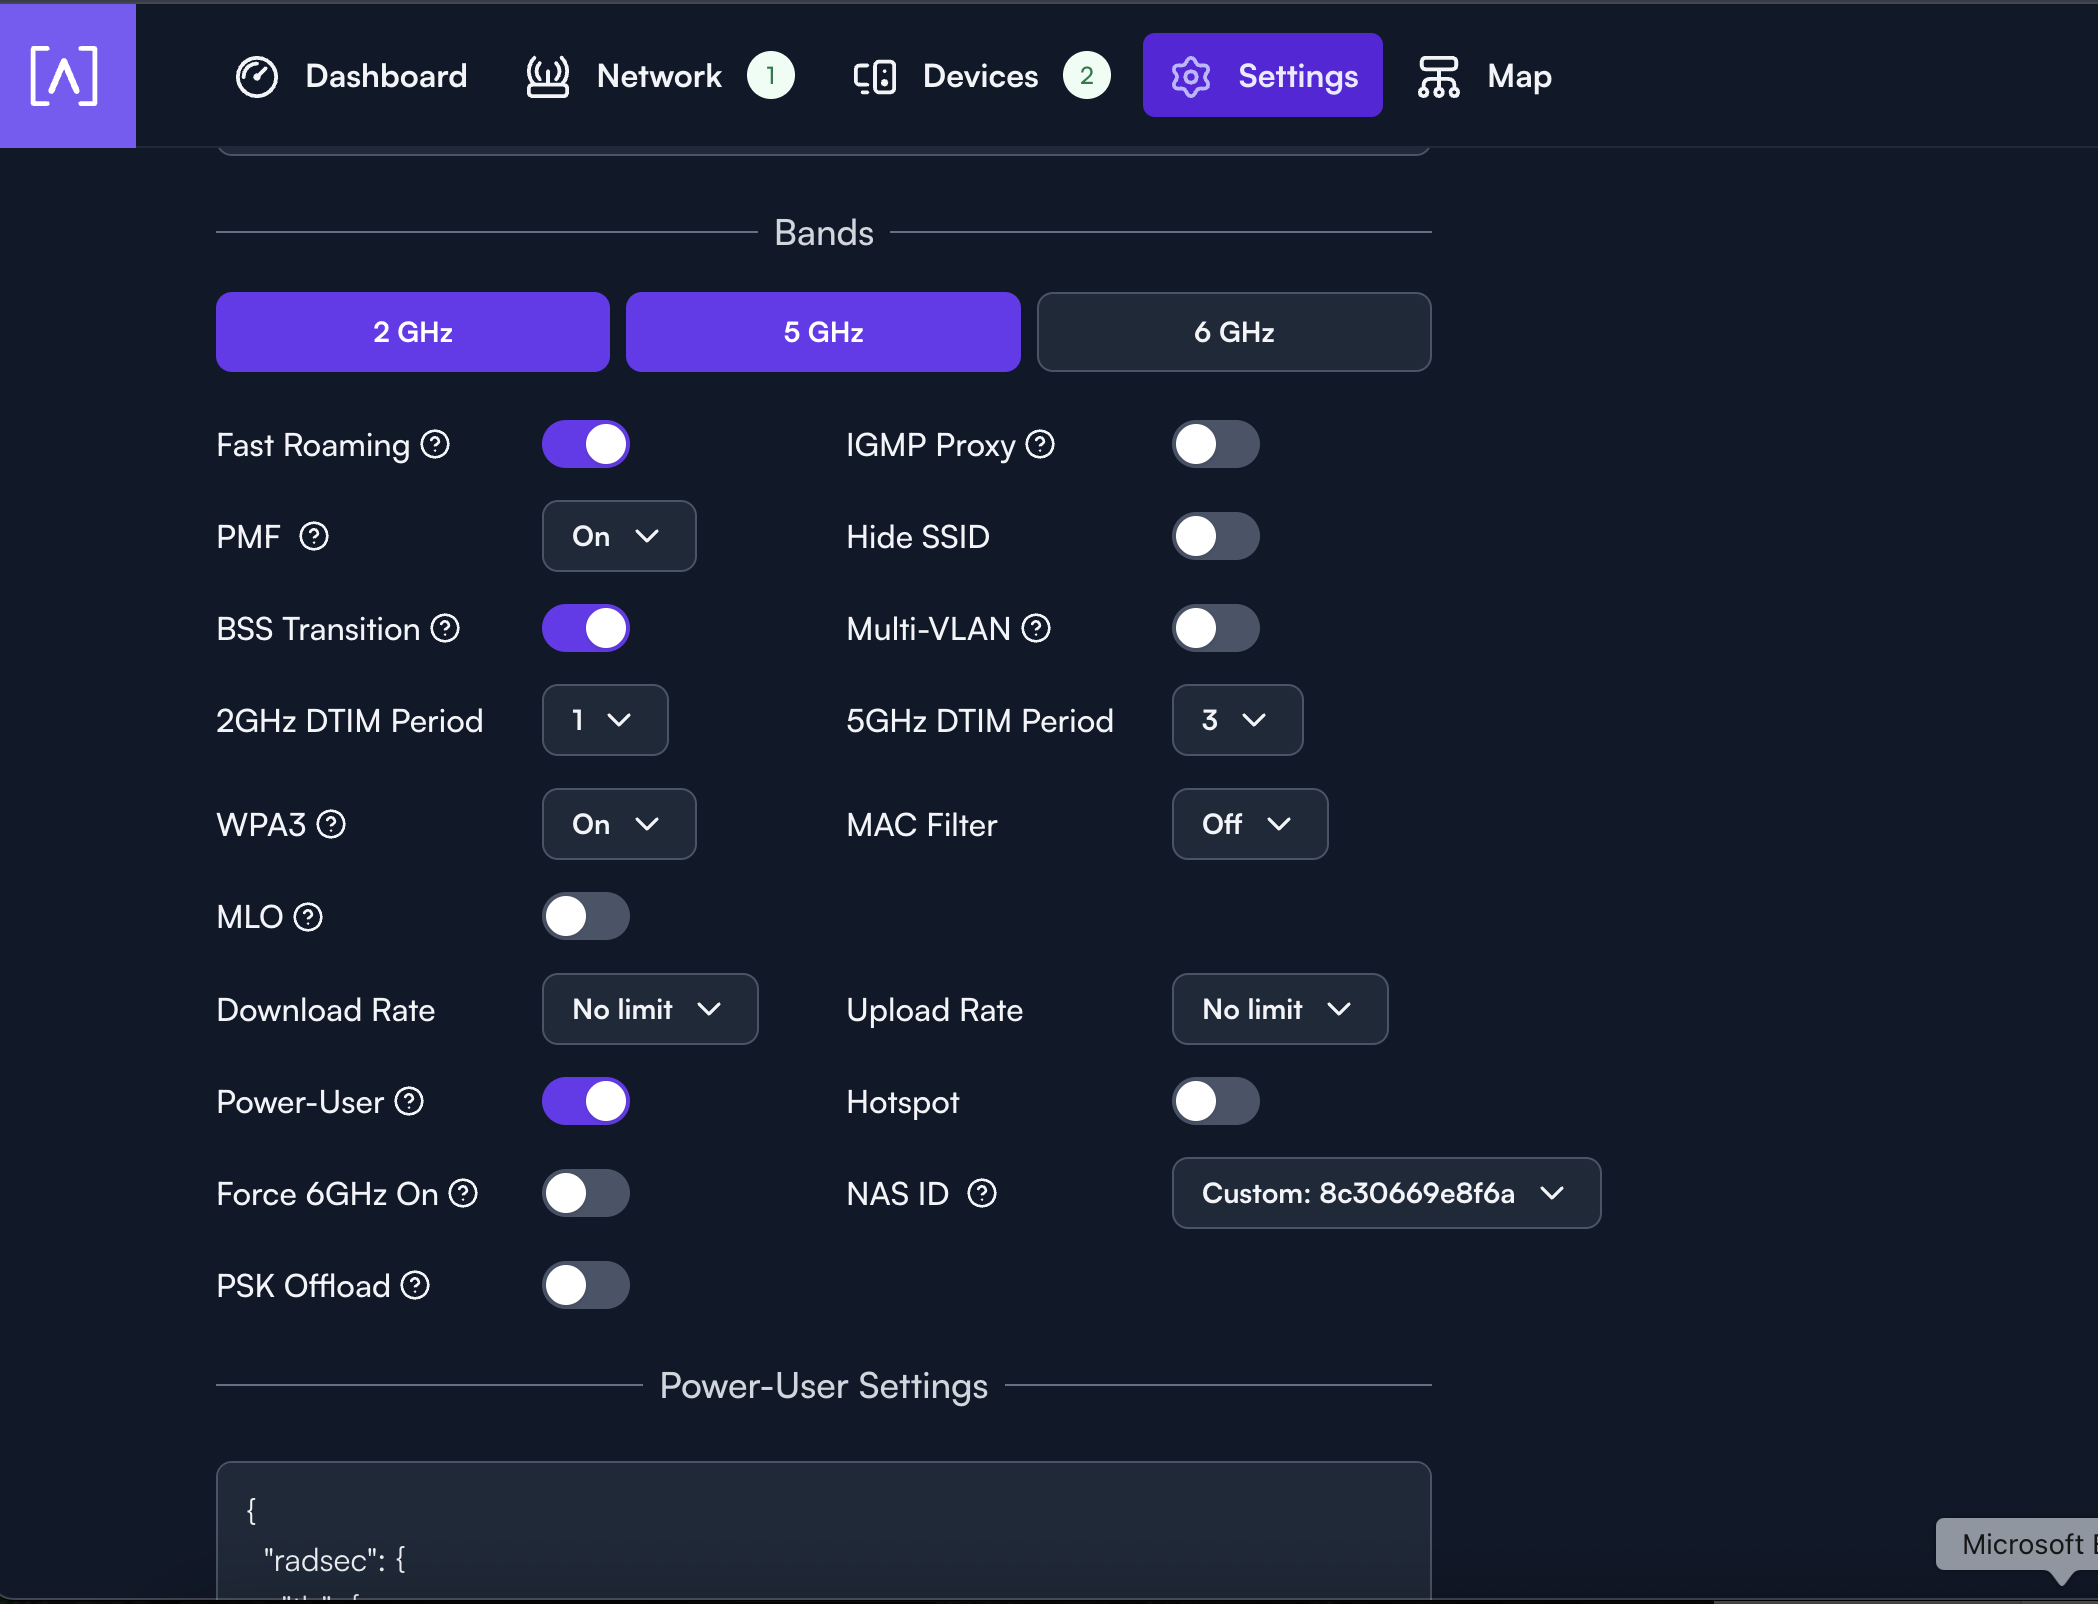
- Scroll down to Advanced.
- Set WPA3 to On.
- Set NAS ID to Custom, and enter the NAS-ID used during Helium network onboarding.
- Leave PSK Offload off. It conflicts with Enterprise security, and clients are prompted for a password instead of connecting through Passpoint.
- Switch Power-User on. A Power-User Settings field appears below.
- Paste the configuration above into that field.
- Press Save.
Verify the Connection
Forget the existing network on your device, then connect to the new network using a device with a supported carrier, such as Helium Mobile.